Not every project I do works out the first time around.
HOW TO MAKE A DRESSER 2ft TALLER - cottage country cabinet
I once saw something like this cabinet online and I
knew I wanted to recreate it so it went on the TO DO
list. One night late last year I started to tear several
pieces of furniture apart, 5 days later this is what
I had created.
CHEATING WITH CHAIR UPHOLSTERY - tip
This is a mini tip to help your fingers and blood pressure get all the way through
removing old fabric from the wood base of your dining chairs.
Using something to pry the staples with like a flat screw driver
and something to pull with such as pliers, get that fabric ripped from
the wood anyway you see fit. A bonfire is not an option for the upcoming tip to be effective!
You have now pulled 7 hundred and fifty six staple and along the way you have avoided
the tricky stuff like these clumps from a happy staple user of the past.
Sometimes patience isn't enough to deal with every last staple and messy crap so ...
Pull all the easy ones, anything sticking up but leave the rest ...
then flip your board over and use the clean side.
This side of the wood has not seen the light of day in countless years and is brand new.
Unless you are the princess and the pea no one will feel or see a few staples left behind hiding
under new foam.
DARK WAX TUTORIAL
The left side is unfinished chalk paint and the right side has been dark waxed.
This process can be scary but if you take the right steps it's like magic.
 |
| I've used Minwax natural (yellow bits) so you can see the wax better during the process. |
When applying wax work in small areas.
Apply clear wax to your unfinished chalk paint.
I have used a large deck brush to push in and around the handle.
A brush works best with 3 dimensional details. You can use old paint brushes for this part.
 |
| Deck Brush found at Home Depot approx $10 good for large projects but does loose hairs often |
This is the important step to understand ...
your clear wax is absorbing into your chalk paint preserving the color and protecting your paint.
It has created a base to which you can apply the dark wax and have it move around much easier.
Remove any excess clear wax and don't worry about buffing.
 |
| Wear a rubber glove when using dark wax |
Now dig deep, count to 10, hyperventilate if you need to and slather on the dark wax.
Work the wax into the crevises and corners with your brush.
The dark wax is simulating dirt and wear accumulated over decades.
Here is the magic ...
Apply more clear wax and you will see the dark wax start to lift and move around.
Continue using your rag or towel to get the intensity you want.
The trick is the dark wax is sitting on top of the first layer of clear wax.
Use your brush again to smooth around details and start to buff.
Check out what ended up happening to this cabinet here:
| **************************************** LAST BUT NOT LEAST .... |
There are 1000's of pieces of up-cycled hardware to choose from at
firstfinds hardware store
https://www.etsy.com/ca/listing/511729001/6-handles-shabby-chic-swirling-white
https://www.etsy.com/ca/shop/Firstfinds?ref=hdr_shop_menu&search_query=misfit+knobs
https://www.etsy.com/ca/listing/496024614/4-ornate-drop-pulls-with-backplates
USING DARK WAX TO AGE A FINISH - royal crest cabinet
TAKING THE ORDINARY AND MAKING IT EXTRAORDINARY.
I would really like to do this again some day on another piece.
SOFA TABLE FROM A SEWING TABLE - parts used to build
I built this sofa table starting with a sewing machine cabinet I purchased at a thrift store.
The finish was in fair shape but many of the moving wood parts didn't work properly anymore,
and the machine wouldn't lift out of the cabinet to use.
The legs are what really caught my attention from across the store.
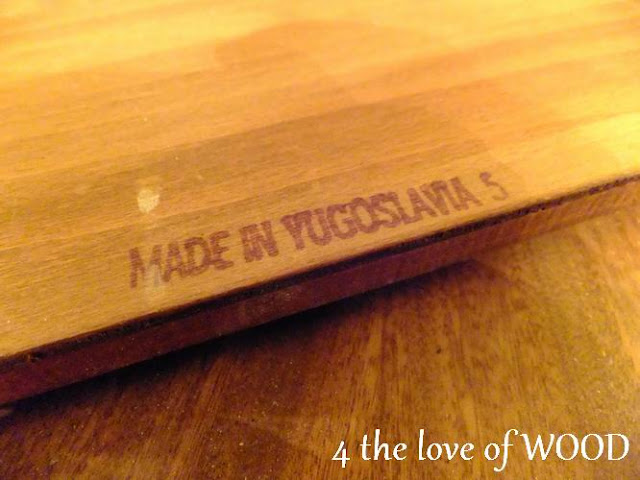
Once I started to work on removing the machine I found a makers mark on the cabinet.
Made In Yugoslavia ... The machine is a Piedmont from the Hudson's Bay Company.
Anyone need parts for their Piedmont?
I was able to take the whole cabinet apart to start rebuilding a longer table.
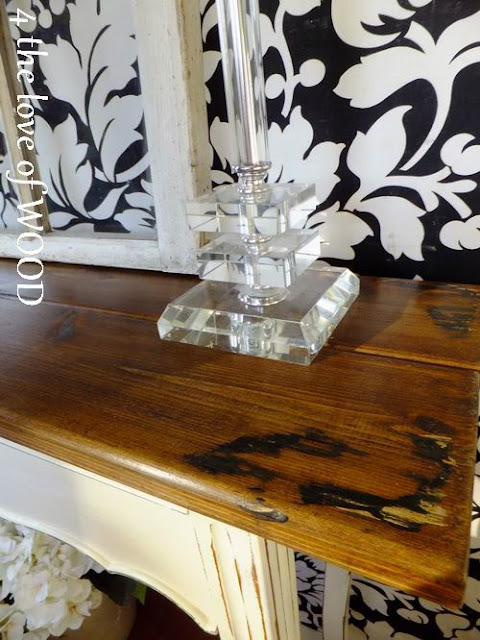
I used a kick board for the front, and aged, stained, and waxed some new wood for the top.
Here's a close up of the finish I created with dark wax on the new top.
The original legs were re-purposed and parts from inside to rebuild the new console table.
Subscribe to:
Posts (Atom)
Email your Questions or Comments
POPULAR ARTICLES
-
I hate seeing vintage furniture made of real wood get discarded . Folks just can't see the potential. That's what happene...
-
I was tasked with repurposing several thrifted items, including an old spoon rack. I thought this should be a fun DIY project. I h...
-
I had the task of making two benches from one old baby crib. This is a look at how I built the first one and the paint finish I used...
-
Did you install some trim in your home and lost steam when it came time to hide the finishing nails? You can always go back la...
-
Learning how to use dark wax can be tricky. Using it on white paint can be terrifying . I have done a short video showing h...


