FURNITURE MAKE OVERS - before and after 1


All the wonderful BEFORE & AFTERS you are about to see look so amazing in person,
and the students that preformed the work were outstanding.


How many of you would like to attend a furniture makeover weekend?
Well the PR Guy here and the LNT Group in Merritt coordinated that exact thing,
and I was the chosen teacher.


we added drawer stops, learned some bled blocking tips, and added a graphic transfer on this dresser
 
18 students, some with multiple projects, 2 days, almost every tool I own,
and with years of experience we gotter done!
 

it was stripped, cleaned, painted grey, clear waxed, then dark waxed. It is off to the upholster soon!


The week before the class, students started to email photos and ideas of that they would like to do.
When this chair's BEFORE pic showed up George started to panic, but I wasn't worried in the least.

vintage high chair painted in a cherry red was heading back to Prince George to be a display piece in a floral shop
 We traveled over 2 hours to get to our destination but some ladies traveled much farther to join us.

simple vintage chair given a new life with a light turquoise spray, sanding, and waxing.
 
We did lots of color mixing and I showed students how to thin and strain paint for spraying.
Any one who wanted to try their hand at using the paint gun could also try it out. 

coordinating wallpaper was added in the back and you can see more of the detail of this cabinet now that it is lighter
We wallpapered and waxed, we stripped some pieces, we stained a few pieces,
we painted and polyed, but best of all ...


 I had a blast running non stop repairing things, adding things, making suggestions,
and simply helping everyone leave with a beautiful new pieces of furniture they would be
proud to display in their homes.


Pin It Now!

FAUX MARBLE - painting a dresser


Our furniture make over class was a great success and the trip over all was fun but I'm pooped out!
Until I get all the photos in order, all my supplies restocked, and the tools put away,
I'm going to show you some projects from the past and ideas I have not shared yet.


It's an *OLD WORLD* style dresser with a faux marble top.


We got this dresser many years ago. It was bright teal when we got it!
The color was very pretty but it had many stickers and the finish was damaged in several places.
It really deserved a classic finish!


BEFORE               and                    AFTER


Since we redid our dressing room it really did not have a place with us any more.
So it was time to move on and let it go to a home where it could be used again.

That's when it went to live in Joelle's foyer!


It was meant to be!


The Chippendale style hardware I used was sprayed with OIL RUBBED BRONZE
from Rustoleum. It's a delicious metallic chocolate color.

The top has seven coats of poly in this photo but a few more were applied to
give it a thicker glassy finished look to the faux marble top.


I learned to faux paint marble long ago for an in expensive bathtub surround.
I do not have more photos or a tutorial on how to paint this but if you want to learn the
different technics, there are tons of tips, tutorials, and videos on line to help you.


The body color is ASCP old white with Minwax dark wax over top.
The bright teal is still inside lining all the drawers. How fun is that?
Traditional outside with a bit of fun inside.


 TIP:

If you are thinking about painting the inside of your drawers remember there are several areas on the
 outer edges of drawers that rub against another part of the dresser. Paint doesn't slide well against
 other painted surfaces, and each layer of paint can make things tighter, so try to paint only one of the
 surfaces that rub and not the other. In the photo I have offered one example but the most important
place to use this tip is on the side of your drawers.
Paint either the drawer side or the inside edge of the cabinet body but not both.
Consider which one is seen more often.

***********************************
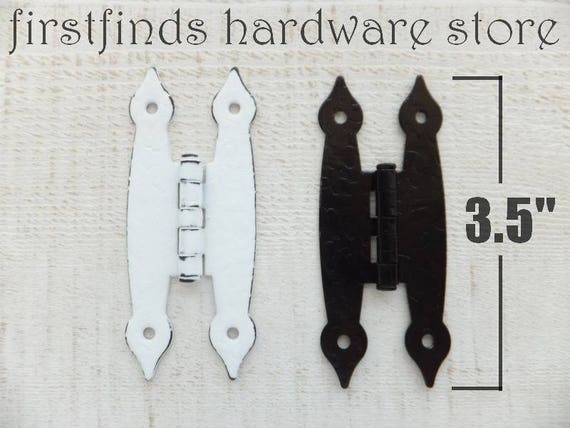
Here are some unique hardware pieces available at


Pin It Now!

MATCHING AN EXISTING PAINT JOB - grey cabinet


after photo
 
I found this little cabinet at a yard sale many years ago. NO BEFORE PICTURE
 It had WAVY ORANGE PLEXI GLASS in the door and SIMPLE ANGLED PLYWOOD LEGS.
What I did adored about the cabinet was the finish. Someone had created this unique vintage
look in grey and it was going to fit perfectly in our mudroom to store supplies.
 
HomeDepot Wallpaper
 
Out with the orange plexi and in with a cool wallpapered panel. I kept the amazing antique handles,
and the grey/brown paint finish. I love the idea of putting a swing handle on it's side for the door.
Think about trying it on your next project.
 
 
Somewhere along the way one of the original legs broke. We would just prop the little cabinet up
and go about our business. When it came time to make over the mudroom it was time to deal
 with the little broken leg. I went to my stash and picked 4 longer cabriolet legs to replace the old plywood ones. Longer legs was also going to make the outlet behind the cabinet easier to use.

I apply dark wax with a glove and paper towel
 
I painted just the legs in a simple grey I mixed with Annie Sloan Pure White & Graphite.
When the legs were dry I used clear wax then generous amounts of dark wax.
It was the exact recipe to get a perfect match with the cabinet finish.
 
 
Here is the cabinet standing proud all fixed, painted, decorated, and filled with automobile supplies!
It's our mini garage hiding our oil and antifreeze, funnels and flashlights.
 
 
To see more of this tiny room makeover:


Pin It Now!

HOW TO CHANGE THE SHAPE OF A CABINET


I think it was fall when I first saw this mini cupboard, it was attached to an email asking if I could give it a makeover. I was intrigued and let her know something could definitely be done to update and beautify the piece.

Pin It Now!

A BED INTO A BENCH - before and after


Every time I walk by this pretty and curvy bench it makes me smile.

Pin It Now!

MUD ROOM MAKE OVER


Our mudroom had been consumed by water bottles, pop cans, discarded boxes, and all the other
crap I didn't want to see in the main part of the house. Time had come to reclaim this room and one
morning of surfing Pinterest got me motivated to start. Type in "AWESOME MUDROOMS" and see what you get.


Day 1, was a cooler morning as it had rained the night before. I was feeling the need to stay inside,
do some cleaning and eventually a great deal of purging. I had plenty of plastic bins that I could
fill and they would work just fine outdoors. So when George got home he had a stack of full bins
 waiting for him to take to the shed. Thank you honey do! The shed will be made over some other day.


Cleaning up the clutter went quickly also thanks to George dealing with the bottles the week before.
 This room is a small addition (5.5ft x 7ft) built around the back door of the trailer. It is not heated
 and in the winter it is cold. Keeping shoes and coats in there is off limits. I couldn't find the right use
 for the room, until now ...

Welcome to the new Etsy Shop!
Handles, knobs, hooks, and castors don't get too upset when they are a bit cold. All the Etsy stock has
 been over whelming the other rooms in the house. I was tripping over bags sitting in the living room,
sharing space in my dressing room, and the worst was giving up the kitchen island to constant piles of
 hardware in some state of being finished. Now it's all contained in this one space, even the work surface.


Day 2 went a lot slower. This was the day to fill and organize all the baskets, buckets, bins, and boxes
 with labels. Gathering all the hardware around the house was so much fun, I was finding new space
 in almost every room. Once the room started to come together with the bench I designed and built, I
wanted to add a soft edge for when we work in there so I hit Home Sense and bought this rug.


The rug is the only item purchased for this makeover, everything else we had.
The window on the back wall looks out to a storage area so I created a new view with a vintage
mirrored window, it makes the room feel bigger and reflects more of the light from the chandelier.

There is a bit more to this makeover which includes the chandelier and a custom paint job
but that will have to wait for another day ...

But there are a couple more photos in the home tour if interested:
http://4theloveofwood.blogspot.ca/p/our-house.html


***********************************
Here are some unique hardware pieces available at


Pin It Now!

Email your Questions or Comments

Name

Email *

Message *

POPULAR ARTICLES

Your first stop for vintage hardware